|
|
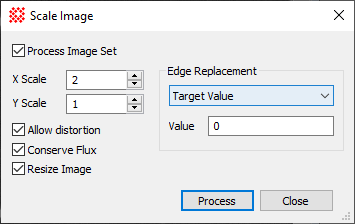
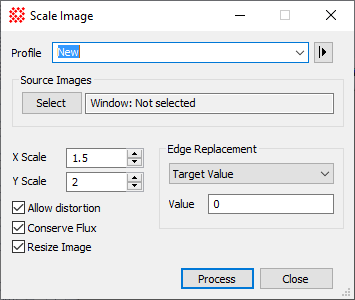
Scale Image The Scale Image command scales an Image Set or a single image in one or both directions. The scaling may be uniform or non uniform, with or without flux conservation (see below).
Scale Image Properties
Conserving FluxFlux is the arrival rate of photons per unit area. If we were to spread the same amount of energy over a larger area, the signal detected per unit area (that is, per pixel) would be reduced because the number of photons arriving per unit area is conserved. This is like measuring the water depth after pouring the same 1 liter of water into a narrow pan or a broad pan. If an image detected an intensity of 2000 counts per pixel and you were to scale it by 2x in both directions, the energy density is then reduced by a factor of 4. The signal per pixel would be 1/4 as great, or 500 counts. There are time that you want to account for this fact and there are times you do not. Mira allows you to choose whether to conserve the flux using the Conserve Flux check box. Allowing DistortionDistortion refers to changing the shape of an object. If you check the Allow Distortion property, Mira expects you to provide a Scale value for each of the two axes. If the values are different, the image can become distorted so that, for example, a circular object images in the first image will become elliptical in shape. If you simply want to enlarge or shrink the image, uncheck the Allow Distortion box and enter the single scale factor for both directions. Correcting Non Square PixelsOne application of this command is to correct for non-square pixels in images taken with early CCD's. In that case, you need to check the Allow Distortion property so that Mira will accept 2 independent scale factors. For proper result, the scale factors must be in the ratio of the original pixel aspect ratio. ExampleSuppose the CCD had a pixel size of 10 microns wide and 20 microns tall. Consider imaging a circle: the circle would cover 2 times as many pixels in the horizontal direction as in the vertical direction on the CCD. When the image is displayed, the pixels are treated as square, so the circle would be displayed 2 times as wide as it is tall. To correct the distortion using the present command, you need to check Allow Distortion and enter 2 scale factors in the ratio of 1:2. The original pixel had an aspect ratio of 1:2, therefore the scale factors that remove distortion also have an aspect ratio of 1:2. If you wanted to magnify the image 2.5 times and also apply the distortion correction, you would enter the properties as
X Scale = 1 * 2.5 = 2.5 Y Scale = 2 * 2.5 = 5.0 Edge ReplacementThe "edge" refers to the blank pixels that move into the output image from off the edge when you shrink the image with one or more scale factors < 1 but you do not choose to resize it. This leaves a border of "blank" pixels around the edge. These pixels have no value but something must be done with them. Mira give you two options for assigning them a value:
Related Topics
Mira Pro x64 User's Guide, Copyright Ⓒ 2023 Mirametrics, Inc. All
Rights Reserved. |


