|
Crop Image
The Crop Command cuts out a rectangular
piece of an image and discards everything outside the rectangle
This command has an interactive mode and a manual mode as described
below. The related
Crop at Cursor command is an express version of the
Crop command.
-
The Crop Image command opens from the
Image Window > Process >
Geometry menu and  button
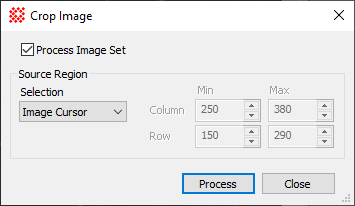
on the Main Toolbar. The "immediate"
form, shown first, opens when an image or image set is displayed in
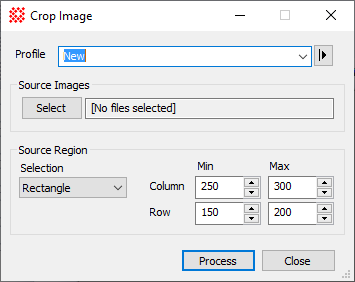
the top-most window. The general form can be used to select source
images from folders, windows, or by matching templates. button
on the Main Toolbar. The "immediate"
form, shown first, opens when an image or image set is displayed in
the top-most window. The general form can be used to select source
images from folders, windows, or by matching templates.


|
Crop Image Properties
|
|
Profile [|>]
|
Selects the parameter profile for this command and
allows you to save or work with existing presets.
|
|
[Select]
|
Opens the
Select Source Images dialog to choose images from an
image window, folder, files, name template, or a Mira File
List.
|
|
Source Region
|
Specifies the rectangular region to be processed.
The options are as follows:
Entire image: The
entire image is processed.
Image Cursor: The
region to be processed is selected using the Image Cursor.
Rectangle: The
region specified by Min and
Max limits for Column and Row
coordinates is processed.
Column and Row, Min and
Max: When Rectangle is
selected, these values specify the column and row limits to be
processed.
|
|
Tip
|
To crop an entire
Image Set with identical position and size, press the
 button on the Image Bar or enable
Process Image Set mode before using the present command. button on the Image Bar or enable
Process Image Set mode before using the present command.
|
Related Topics
Image Geometry Commands
Crop at Cursor
Copy and Paste Commands
Duplicate
Image Cursor
Mira Pro x64 User's Guide, Copyright Ⓒ 2023 Mirametrics, Inc. All
Rights Reserved.
|


