Transfer Function Properties
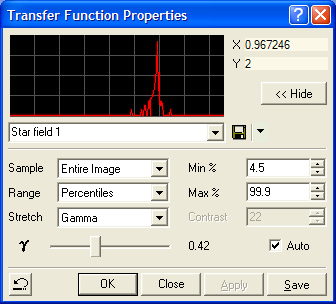
The Transfer Function Properties dialog is used to interactively adjust the transfer function of an image. If you change settings for an Image Set, the changes may be applied to either the active image or to the entire set. For RGB images, the adjustments of the transfer function are handled by the Palette Properties dialog.
To Open the Transfer Function Properties dialog from the Image Toolbar or View > Transfer Function menu. You can also use the Ctrl+T keyboard accelerator when an Image Window has focus.

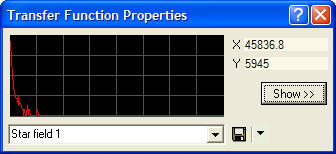
The Transfer Function Properties is a Drop Dialog that allows you to choose to show all properties or show only the image histogram and the Profile Control in the upper part of the dialog. If you simply want to choose an existing transfer function profile and do not need to change it, you can keep the dialog in minimize size mode to save desktop space, like this:

|
Note |
The graphic in this dialog shows the image histogram for the region specified by the Sample parameter. The Other Preferences page has an option to plot the logarithm of frequency on the Y axis when you need to compress the frequency range. |
The Sample, Range, and Stretch settings control the way the transfer function is computed for the image. These properties are described in detail in Transfer Functions.
The ![]() slider sets the
gamma value when the Stretch method is
set to Gamma. This controls the contrast at preferentially the
lower brightness levels (gamma < 1) or higher brightness levels
(gamma > 1).
slider sets the
gamma value when the Stretch method is
set to Gamma. This controls the contrast at preferentially the
lower brightness levels (gamma < 1) or higher brightness levels
(gamma > 1).
The [Default] button saves the current preferences to the named profile and sets this profile as the default for new Image Windows. This button does not load any default settings into the dialog or to the image window.
The ![]() button reverts to
the previous parameter settings. Use this button if your changes
are making the image worse and you want to start with the
previously saved preferences for the current profile.
button reverts to
the previous parameter settings. Use this button if your changes
are making the image worse and you want to start with the
previously saved preferences for the current profile.
The Auto check box controls whether changes in this dialog are immediately applied to the image. If you check this box, you will see the result of the change when you release the control (e.g., drop box, slider, etc.). If this box is not checked, then changes will be applied to the image only after you click the [Apply] button. Using the Auto setting may cause some delays in re-displaying large images or entire image sets or otherwise on a slow computer.
The [Apply] button applies the property changes when Auto is not checked.
|
Note |
Transfer Function properties do not apply to RGB images. For RGB images, use the Palette Properties dialog instead. |
Displaying Images, Image Windows, Palette Properties, Transfer Functions