Crop by Rectangle
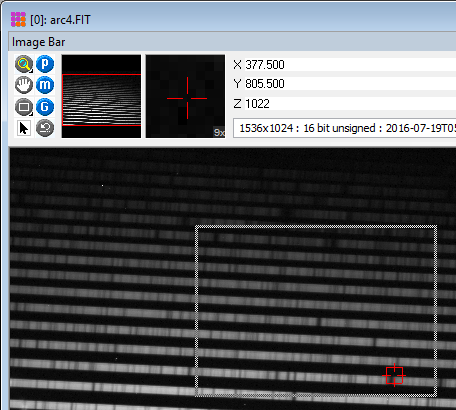
The Crop by Rectangle command crops an image or image set by drawing a freehand rectangle on the image (as shown below, the crop area was stretched from the upper left to lower right corner of the rectangle). This command is useful when precision placement of column and row limits is not required. To get precisely located crop boundaries, use the other two commands: Process > Geometry > Crop at Cursor and Process > Geometry > Crop Image. This command is also connected to the traditional “scissors” button on the main toolbar and the Ctrl+X keyboard shortcut when an Image Window is on top. If you make a mistake, use Ctrl+Z to restore the original uncropped image or image set.
Initiate this interactive command from the Process > Geometry menu.
Initiate this command using Ctrl+X when an Image Window is on top.

After launching the command, a Hint Window appears at the top of the screen, reminding you to mark the beginning corner (with the left mouse button down) and stretch the cropping rectangle to the opposite corner. As soon as you launch the command from the menu or toolbar, the command is live and expects a rectangle to be drawn on the image. However, the live command can be aborted at any time using the Escapekey or by right-clicking the mouse. The Hint Window can be moved and resized for the next time it opens and can be disabled/enabled using the checkbox in the General Properties dialog (Ctrl+R).
Mira Pro x64 User's Guide, Copyright Ⓒ 2023 Mirametrics, Inc. All
Rights Reserved.