Almost all Mira Image Windows and command dialogs
allow you to work with an Image Set as easily as with a single image. But
oftentimes you may want to apply some command or procedure to only
one image of the image set. For example you might want to measure
statistics on only one of the 10 images displayed in an Image Window. You need a
way to select whether an operation is performed on one image
or on all images, and you need to be able to determine the
current setting. Mira solves these problems by keeping track of 3
internal status Flags: one for processing image sets, another for
measuring image sets, and a third one for plotting image sets.
Using Image Set Flags
Image Set Flags are used by Mira in each Image
Window and as defaults for new windows. This software design lets
you set default behavior for displaying new images and then to
change the behavior inside each Image Window. When a new Image
Window is opened, it inherits the default setting; at any time
afterwards, you can change the behavior of each individual window.
As you learn to use Mira you will discover the value of this
capability when working with images. Here is how this works:
Default and Local Image Set Flags
Default Flags
Default flags are inherited by each new Image
Window. The default settings are changed using the Other Preferences page
of the Mira
Preferences dialog. Click [Apply]
to apply the change locally to the currently active Image Window,
or click [Default] to make the change
the default for new windows.
Local Flags
Initially, the default flags are also the local
flags for the Image
Windows. To change the Local flag settings, use the buttons on
the Image Toolbar
or use a menu command.
Image Sets versus Single Images
Mira commands can work with either a single image
or the Image Set
displayed in an Image
Window. Three image set "flags", or switches, control the
behavior. The flags can be toggled on or off as the default
behavior for new image windows or they can be changed only for
subsequent operations on the current window. These are described in
the table below.
Image Set Flags
Process
Image Set
Controls operations that affect pixel values, such
as image arithmetic commands, listing header keywords, and also
when adjusting the Transfer Function.
Measure Image Set
Controls operations that make measurements such as
Centroid
and Statistics.
Graph Image Set
Controls commands that graph or plot data from the
image window, such as Column Profile Plot.
Changing the Image Set Flags
There are two ways to set or change the image set
flags for the current Image Window: from a menu command and from buttons.
All commands are toggles, which means that clicking (executing)
them changes their state to the opposite value, i.e., from
on to off, or from off to on.
Menu Commands
The Image Set popup menu in the Image Context Menu
indicate the state of the image set flags for the top-most Image
Window. From these menu commands, you can change the flags to their
opposite state. The current state is indicated in the menu: If a
check mark exists next to the command, then the command is set to
apply to an image set. To flip the flag to its opposite state, such
as from [image set] to [this image], highlight the menu item and
close the menu. If the Image Toolbar is visible for the current image
window, you will see the affected button change state (see
below).
Toolbar Buttons
The buttons shown in the table below change the
image set flags from on the Image Toolbar. These changes affect only the future
operations on the current Image Window. The buttons indicate their
current setting by their pressed state and color.
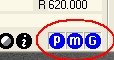
Ablue button indicates that the
entire image set is selected. In the window fragment shown
here, all 3 buttons are pressed to enable the entire image set to
be used.
A dark
gray button indicates that only the active
(visible) image is selected.
Image Set Buttons
Sets the local Process Image
Set flag for the window.
Sets the local Measure Image
Set flag for the window.
Sets the local Graph Image
Set flag for the window.
Select the General Preferences page by
clicking its tab.
Check or uncheck the Process,
Measure, or Graphing options as desired.
To apply the changed preferences locally,
only to the current Image Window, click [Apply] or [OK].
To set the preferences as program defaults,
click the [Default] button.
Changing Local Image Set Flags
Select the Image Window of interest. Then use one
of the following, equivalent methods to change the Flags:
From the Image Toolbar:
At the top of the Image Window is the Image Toolbar. Buttons for
these flags are located on the right end of the toolbar.
Click the Process,
Measure, or Graph buttons to set the desired state. You can
tell the current state by letting the mouse hover over the button
until the Tooltip appears. If the button is pressed (blue), image
set will be processed, measured or plotted. If the button is out
(black), only the active image will be processed, measured, or
plotted.
From the Image Context Menu:
Right click on the image to open the Image
Context Menu.
At the bottom, select the Image Sets
popup menu. If there are 2 or more images in the image set, you
will see the local Flags enabled. If checked, the entire image set will
be processed, measured, or plotted. If the window contains only 1
image, the local Image Set Flags will be disabled.