Go To Coordinates
The Go To Coordinates command has a dual purpose: it loads the precise coordinates of the Image Cursor and sends the Image Cursor to exact coordinates. Since the coordinates are saved in history lists between sessions, it can be used to send the cursor to the same coordinates multiple times or in different Mira sessions. This tool works with the top-most Image Window and stays on top while you adjust other windows. This makes it useful for transferring exact Image Cursor coordinates from one Image Window to anotherImage Window by clicking the Load button on the source image, bringing a target image window to the top, and then clicking the Go button.
Open the Go To Coordinates dialog open from the Image Window > Coordinates menu or using theCtrl+G key on the top-most Image Window. This command is also available from the Cursor submenu of the Image Context Menu.
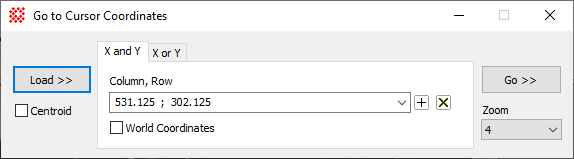
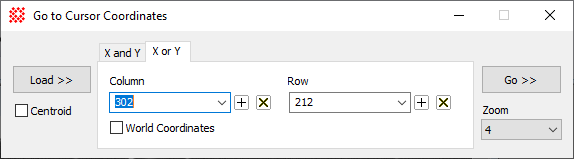
The cursor position may be specified in either pixel coordinates (column,row) or in calibrated world coordinates. Coordinates may be entered into the coordinate fields manually by pasting or by typing the values directly, or automatically by using the [Load >>] button. When entering values manually, two pages are provided to accept coordinates independently or together. The X, Y page accepts coordinates separated by a semicolon (;). The individual fields of a world coordinate may be separated by a space or comma. The X and Y page accepts coordinates in separate boxes. Choose the page that is most appropriate to your situation.
|
Go To Coordinates Properties |
|
|
[Load >>] |
Loads the Image Cursor coordinate from the current image in the top-most Image Window. |
|
[Go >>] |
Sends the Image Cursor of the top-most Image Window to the listed coordinates. |
|
Column, Row |
This field shows the coordinates to use. If [Load >>] is clicked, the Image Cursor column and row coordinates replaces the coordinates listed. Format options for manually entering world coordinates are described below. The two coordinates must be separated by a semicolon (;), like 255.5 ; 608.25 or 7 18.8 ; -24 57 00. |
|
Column |
This field shows the column coordinate to use. If [Load >>] is clicked, the Image Cursor column coordinate replaces the column coordinate listed. Format options for manually entering world coordinates are described below. |
|
Row |
This field shows the row coordinate to use. If [Load >>] is clicked, the Image Cursor row coordinate replaces the row coordinate listed. Format options for manually entering world coordinates are described below. |
|
|
Check this box to load world coordinates from the image or send the cursor to world coordinates entered into the coordinate fields. If not checked, the ordinary column and row coordinates are used. |
|
Zoom |
This list selects the zoom factor for displaying the image after clicking [Go >>]. |
The cursor coordinate may be specified in either
world
coordinates or pixel coordinates according to the state of the
![]() World Coordinates checkbox.
World Coordinates checkbox.
Uncheck the World Coordinate box to use Pixel Coordinates specified in (column,row) measure.
Check the World Coordinate box to use World Coordinates specified in linear units like cm, feet, or microns, or an angular coordinate system like (RA, Dec) or (lat, long), etc.
In both modes, the image cursor is moved to the exact coordinate of the image and, if necessary, the image is scrolled to bring the target coordinate to the center of the image window. TheZoom setting controls the zoom factor used to center the image when using the[Go >>] button.
Mira provides a relaxed format for world coordinate positioning of astronomical image data in Right Ascension and Declination. The RA and Dec may be specified in any of the formats like those in the table below. Two coordinates entered into the single text field of the X, Y page must be separated by a semicolon, ;.
|
Right Ascension |
Declination |
|
7 18.8 7 18 48 7 18 48.0 7h 18m 48.0s 7:18:48.000 7.313333 |
-24 57 00 -24 57 -24.95 -24:57:00 -24d 57m 0s -24d 57m |
Image Cursor, Image Coordinate System, World Coordinate System