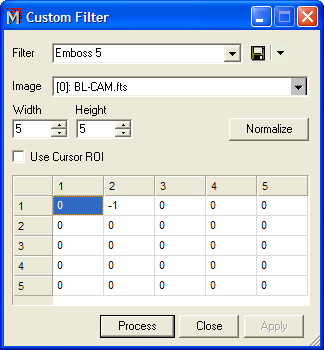
Custom Filter
The Custom Filter command convolves a user-specified filter kernel with an Image Set or a single image. The filter kernel may be any size you specify and a given kernel may also be normalized to a "volume" of 1.0 without typing in normalized weights. The kernel description can be saved as a profile and reloaded when needed
This command opens from the Process pull-down menu.

A filter kernel is specified by its width, height, and kernel values. The kernel values are actually weights to be applied to the pixels in the neighborhood of each target pixel when the filter is applied to an image. The example above shows one case of a 5x5 embossing filter which gives a 3-D appearance.
|
Filter |
Selects the filter by name. This is a Profile containing all the parameter settings for filters you have saved. |
|
Filter Weights |
The weight for each element of the filter kernel. After entering weights, you can normalize the filter to unit weight by clicking the [Normalize] button. |
|
Width |
Sets the number of columns in the filter grid. |
|
Height |
Sets the number of rows in the filter grid. |
|
Normalize |
The Normalize check box normalizes the filter to have a sum of all weights equal to 1.0. Another way to say this is that it causes the filter kernel to be scaled to unit volume underneath the weight profile. |
|
Use Cursor ROI |
If you check this item, only the region inside the Image Cursor is filtered. |
The [Normalize] button changes the kernel values in the weight grid. When you click this button, all kernel values are summed to produce a normalization constant which is then divided into all kernel entries. The result is a kernel for which all weights sum to 1.0. Use normalization when the filter should preserve the signal level. A filter like the embossing filter example show here does not use normalization. In fact, the sum of kernel weights for this filter is 0.0.